

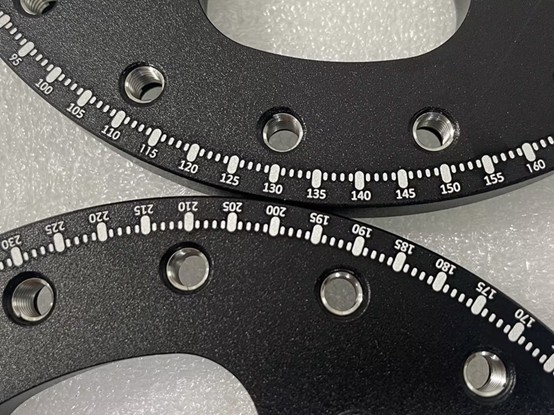
When it comes to manufacturing high-precision CNC turned parts, achieving a smooth and flawless finish is essential for both functional and aesthetic purposes. Tool marks, which often result from improper settings or handling during the machining process, can significantly impact the performance and appearance of the final product.

In this article, we’ll explore effective methods to prevent tool marks on CNC turned parts, ensuring that your components meet the highest standards of quality and precision. By understanding the underlying causes and applying the right techniques, you can enhance the reliability and visual appeal of your parts.
Common Causes of Tool Marks in CNC Turning
For any high-precision machining application, manufacturers have to meet stringent quality standards. Tool marks are a common challenge in high-precision CNC turning. An oversight in the machine, tool, or cutting parameters compromises the required precision and leads to tool marks. Understanding the root causes is key to preventing them effectively.
Improper Cutting Parameters: Cutting parameters alter the results. If either the feed rate or speed is too high or too low, that causes chatter marks and create lines on the surface. Excessive feed rates or spindle speeds can cause excessive tool pressure, leading to inconsistent tool paths and visible marks on the surface. Similarly, too low a cutting speed may result in built-up edges, affecting surface smoothness.
Tool Wear and Improper Tool Selection: In many ways, the tool itself is responsible for marks. A worn-out tool creates irregular surface textures, while an incorrect tool geometry (such as improper nose radius) can leave unwanted patterns. Using sharp, high-quality tools with appropriate coatings reduces friction and prevents tool marks.
Vibration and Machine Rigidity Issues: Machine vibrations are also responsible. Machine vibrations due to improper tool holding, loose workpieces, or unstable machine structures can result in chatter marks. Ensuring a rigid setup and proper damping mechanisms helps eliminate these defects.
Material Characteristics: Some materials, such as soft metals (aluminum, copper), are more prone to scratches. Using lubricants and adjusting cutting conditions can minimize tool marks.
Inadequate Coolant or Lubrication: Insufficient lubrication leads to increased friction and poor surface finish. Proper coolant application ensures smooth cutting and reduces tool marks.
By optimizing cutting parameters, selecting appropriate tools, stabilizing the machine setup, and using effective lubrication, manufacturers can significantly reduce tool marks and enhance surface quality in CNC-turned parts.
Tool Selection and Maintenance
Tool selection can make or break the CNC-turned product. The tool choice must be based on the finishing operation and target material.
For example, a carbide insert with a larger nose radius or a wiper geometry is best for achieving a smoother surface. The use of coated and uncoated tools is also specific. Uncoated sharp inserts work best for aluminum, while steel requires special coatings as they help reduce friction.
Positioning of the right tool is equally critical. A positive rake angle reduces cutting forces and plays a small part in improving the surface. So does the center height. It needs to be set in a way that prevents the tool from dragging on the surface and scoring the part.
Due to their job nature, cutting tools are prone to wear and tear. In nominal jobs, a slightly dull tool can work, but for high-precision parts, a very sharp, perfectly shaped tool is needed. To ensure that, regular inspections must be carried out before tool installation.
Optimizing Machining Parameters
For best surface results, spindle speed (RPM) and feed rate must be optimized. Find a combination/sweet spot that produces minimal vibration and a fine feed per revolution.
It has been observed that a lower feed rate with a moderate to high spindle speed yields a smoother finish, but too high an RPM may excite vibration in some setups. It also accelerates the tool wear.
Experts suggest that the final dimension shouldn’t be hurriedly attempted in one rough pass. Instead, the best approach is to leave a small finishing allowance (e.g., 0.1–0.2 mm). Then, take a light finish cut to complete it. A lighter depth of cut on the final pass reduces cutting forces and provides a better surface finish.
Friction also impacts the surface roughness of parts; the reason why there should be a lubrication mechanism. The coolant basically reduces the cutting temperature and flushes away chips that might otherwise scratch the surface.
The tooling path is partially responsible. Plan tool paths such that the tool does not dwell in one spot or pause on the part’s surface. Any deliberate stop (for measurement or an index) should be done with the tool retracted, clear of the workpiece.
Alter Machine Setup for Vibration Control
High-precision results require a well-maintained machine. Calibrate the CNC lathe in a way that the spindle and ways run true. Fix any wear in slides, loose parts, or worn bearings.
The tool holder needs to be solid too. For long or thin parts, support the end with a live center. Make sure the chuck jaws are tight and clamping the part evenly. Uneven clamping can cause the part to vibrate.
Keep overhangs short. An extended surface has a higher risk of vibration (similar to a flexible shaft). So, in instances where a long reach is required, try a tailstock support. On the tooling end, use the shortest possible tool length or a vibration-damped boring bar for internal turning.
Secondary Finishing Approach
Despite best efforts, some turned parts may still have minimal tool marks that need removal. To counter that, a few secondary finish options can follow. However, their allowance must be factored in before, when finalizing the design and dimensions.
In cases of extremely fine features or hard-to-reach surfaces, use non-mechanical finishing like electropolishing. They have capability to dissolve a microscopically thin layer of material, smoothing out subtle tool ridges.
Conclusion
Preventing tool marks in CNC-turned parts requires a holistic approach, where you control the machine setup, cutting parameters, and tool conditions with precision.
In the future, smart machining and AI might help reduce tool marks and make things more efficient. The companies that use these new technologies along with basic machining principles will be the ones leading the pack.
