

Are you a retro documentary buff or a lover of old-school film looks? Maybe you’re a teacher, a narrator, or a video content creator who wants to get that retro feel for your videos.
One of the things that makes those old documentaries unique is the voice. Finding the right voice, though, is not easy anymore. Hiring someone to narrate costs time and money.
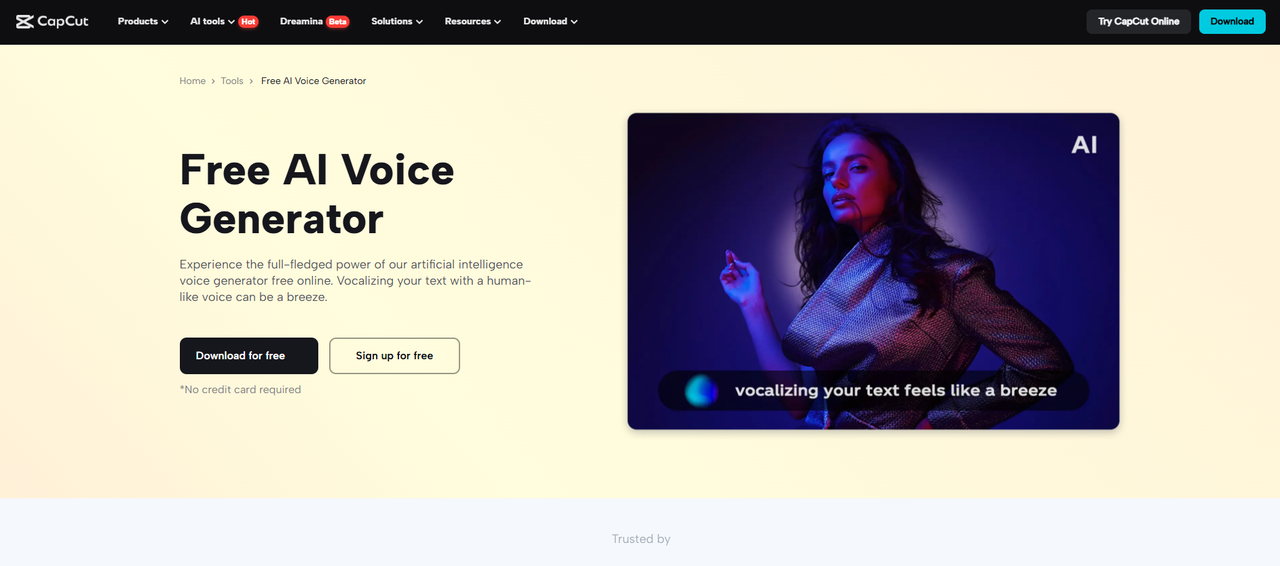
That’s where the CapCut PC is useful. It provides you with an uncomplicated way to apply that retro voice with built-in text-to-speech capability.
You’re able to get your script to sound like those vintage VHS tapes, crisp, uniform, and with loads of personality. Let’s get right into it and see how you can give your videos that retro aesthetic and feel like going back in time.
Why Utilize TTS for Retro Documentary Voiceover?
Retro documentaries have a sound that we all identify with. The voice is relaxing, serious, and clear. It sounds somewhat robotic. That tone makes the story feel realistic and impactful. CapCut PC provides you with the ability to reproduce the same voice tone from its built-in text-to-speech.
You do not need a recording studio or hire someone to read it aloud. You just write your script, pick the voice, and the program does the rest. It is time and cost-effective. You can even adjust the voice.
You can slow down, lower, or make it more crisp to the voice of old documentary films. Another big plus is that the voice is always consistent from start to finish. This is a bonus if you’re doing a series.
You do not have to re-record anything. If a sentence does not sound correct, just fix the script and read it over again. This is also great if you do not speak the language as a native or do not wish to record your voice.
Software like CapCut PC and other computer programs for AI voice generator help you have the correct voice with minimal effort. Some of the pro voices on CapCut Desktop Video Editor are even paid. You may require a subscription to enjoy those.
Step-by-Step Guide to Creating Retro Narration with CapCut PC
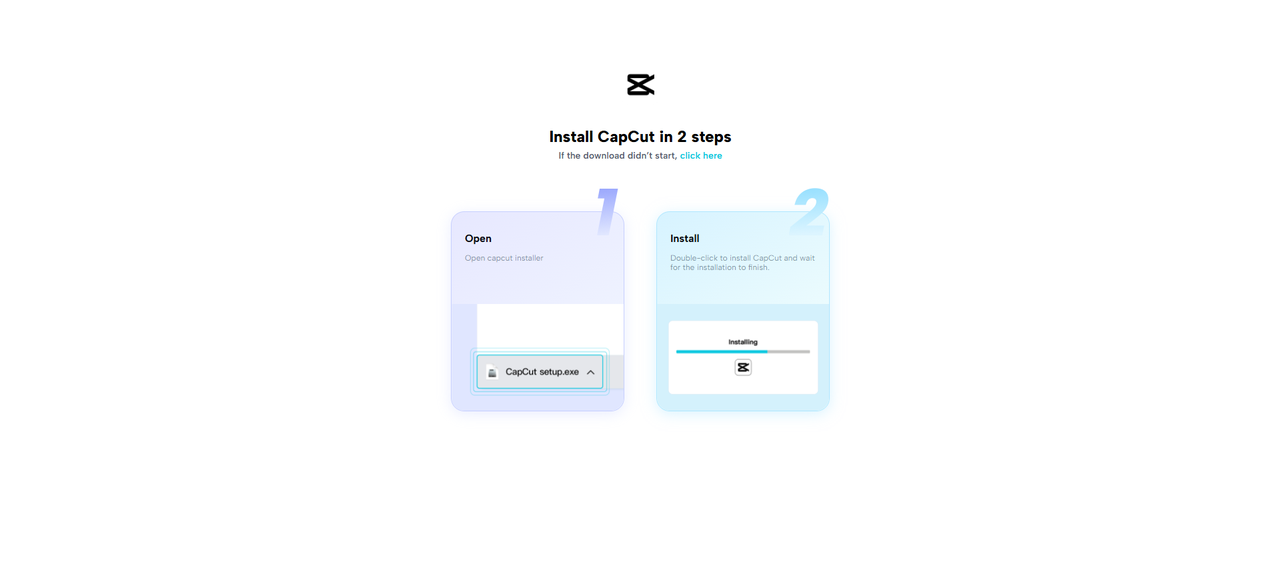
Step 1: Install CapCut Desktop Video Editor
Start by downloading the CapCut Desktop Video Editor from its official website. Once downloaded, complete the setup process and sign in to your free account. The software is compatible with most contemporary laptops, but it’s a good idea to verify the basic system requirements before installing.
After setup, you’ll have access to tools like voice editing, visual effects, and even an integrated AI video upscaler. This feature is great for making old or low-quality video clips look cleaner and sharper.
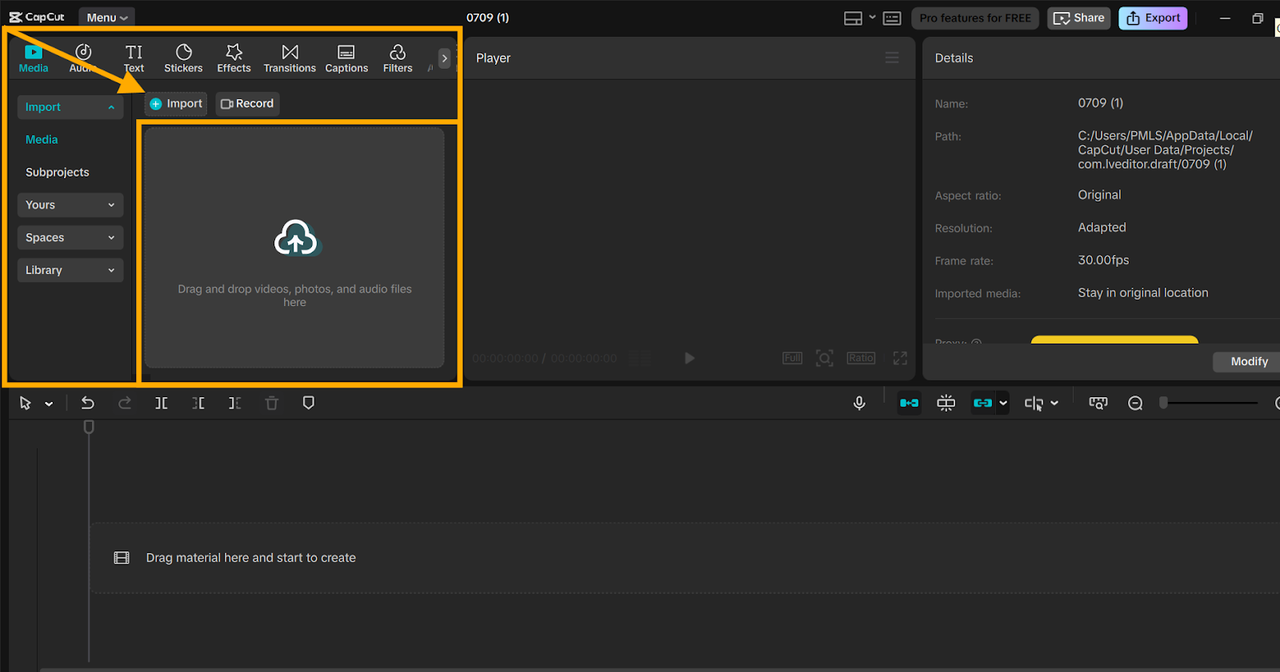
Step 2: Import Your Video Footage
Second, open CapCut PC and press the “Import” button in the “Media” panel. Alternatively, drag and drop your clips into the workspace.
Use visuals that recall the retro feel, black-and-white footage, old newsreels, or worn-out family recordings. This type of content reacts well to old-school voice-overs and emphasizes the vintage documentary feel.
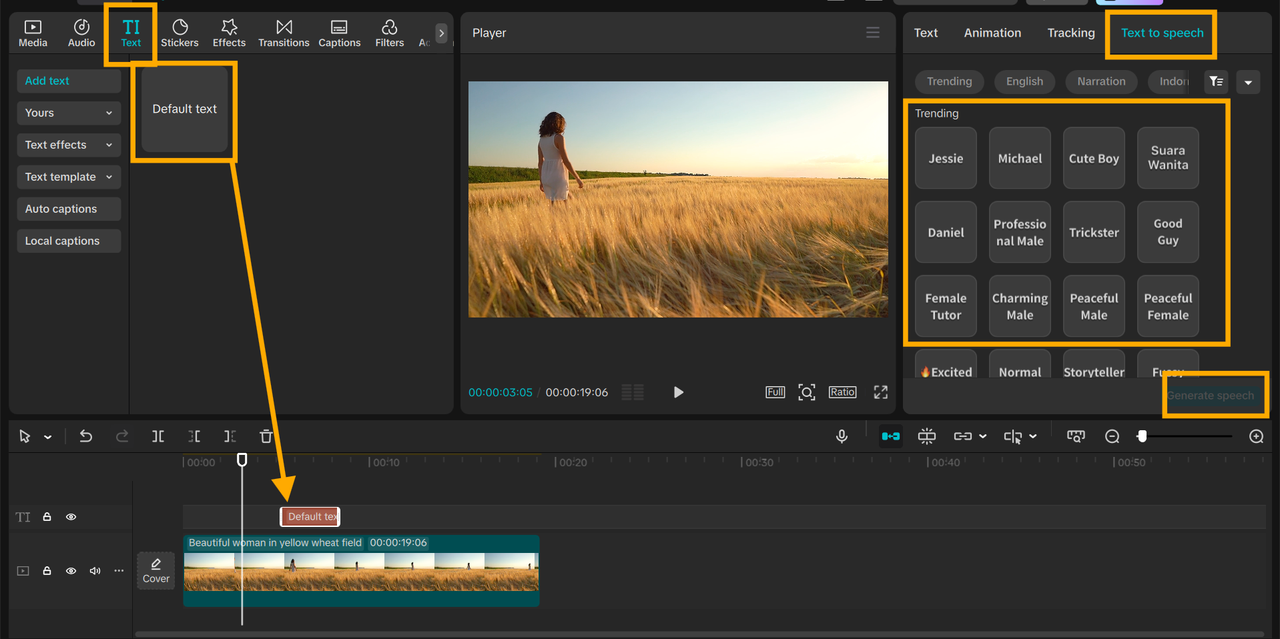
Step 3: Insert TTS Narration
Click “Text” at the top. Paste your script into the input box. Then go to the “Text to speech” feature on the toolbar. Then choose a voice that recalls old-fashioned narration, slow, smooth, and deep.
You can tweak the speed, pitch, and tone through sliders on the TTS panel. This helps mold the voice to be in harmony with the vibe of your video. Some of the richer or more realistic-sounding voices might require a paid plan.
Press Preview to hear it. If it sounds off, just go ahead and edit your script and do it again. The CapCut Desktop Video Editor uses smart text to speech AI so that your voiceover will sound natural and polished, never actually recorded a voiceover before.
Step 4: Polish Your Video with an Authentic Retro Feel
To complement your narration, add retro effects to your video. Visit the “Filters” tab and apply grain, VHS, or black-and-white. You can also find these under the “Effects” tab.
Next, use retro scene transitions between shots, like wipes or fades. Add text overlays for names, dates, or places in a retro font. These can be found under the “Text” or “Transitions” panel.
These small things help you keep the viewer engaged and add that retro feel to your video.
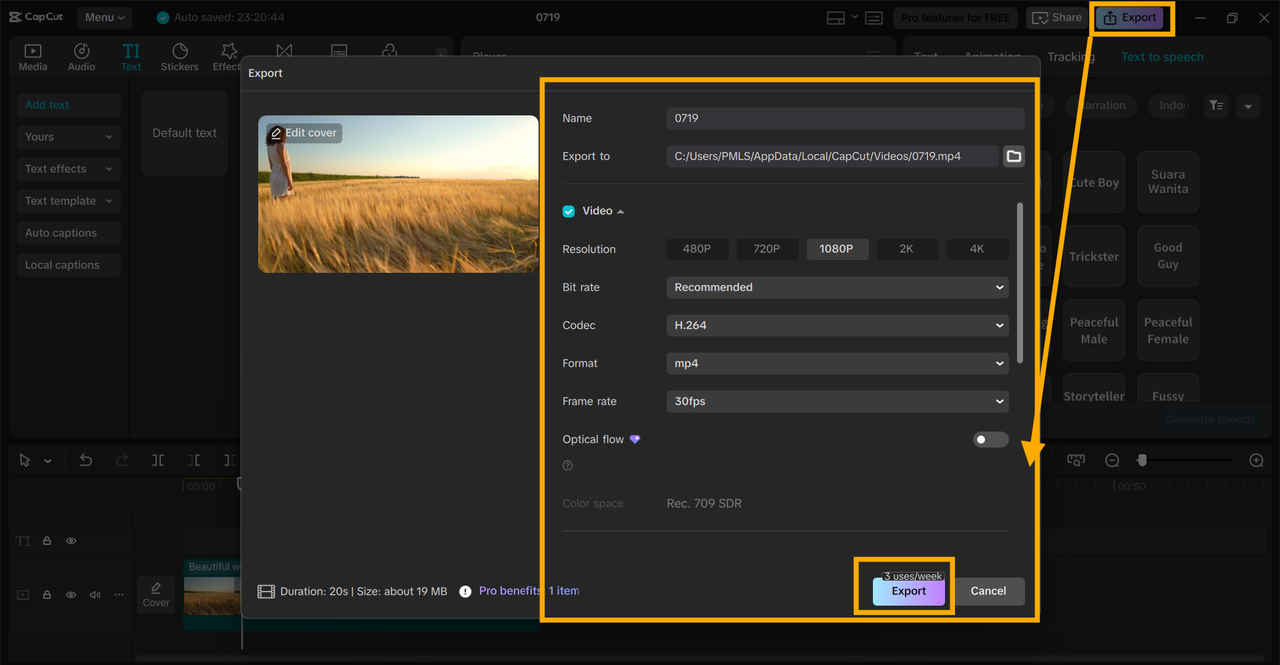
Step 5: Export and Share
When your video is the way you desire it to sound and look, go to the “Export” button at the top right of the CapCut Desktop Video Editor window. Choose your video format, resolution, and bitrate. MP4 works best for most websites.
You may export watermark-free if your project is not working with premium assets. Save and then share your video to YouTube, Vimeo, or whatever social network.
It’s also wise to save your project file. That way, you can come back and rework the narration or video later if needed. The more effects you use, the longer the export time may be.
Conclusion
With the CapCut Desktop Video Editor, such a retro-styled documentary is finally within reach. You can create voiceovers that have the same sound as those in old movies, without a studio and a voiceover artist. This makes it such a perfect option for teachers, video producers, or anyone who wants that age-old look and sound.
The in-app text-to-speech functionality is easy and convenient. You can personalize the voice according to your story. Just remember that some of the premium voices and tools need a paid account.
Download CapCut PC from its official website and utilize it for your next project. Bring your story to life with a classic voice that will take your audience back in time.
